 VitaroUNO INDUSTRIAL
Installation guide
Paver Pedestal Installation: Step-by-Step
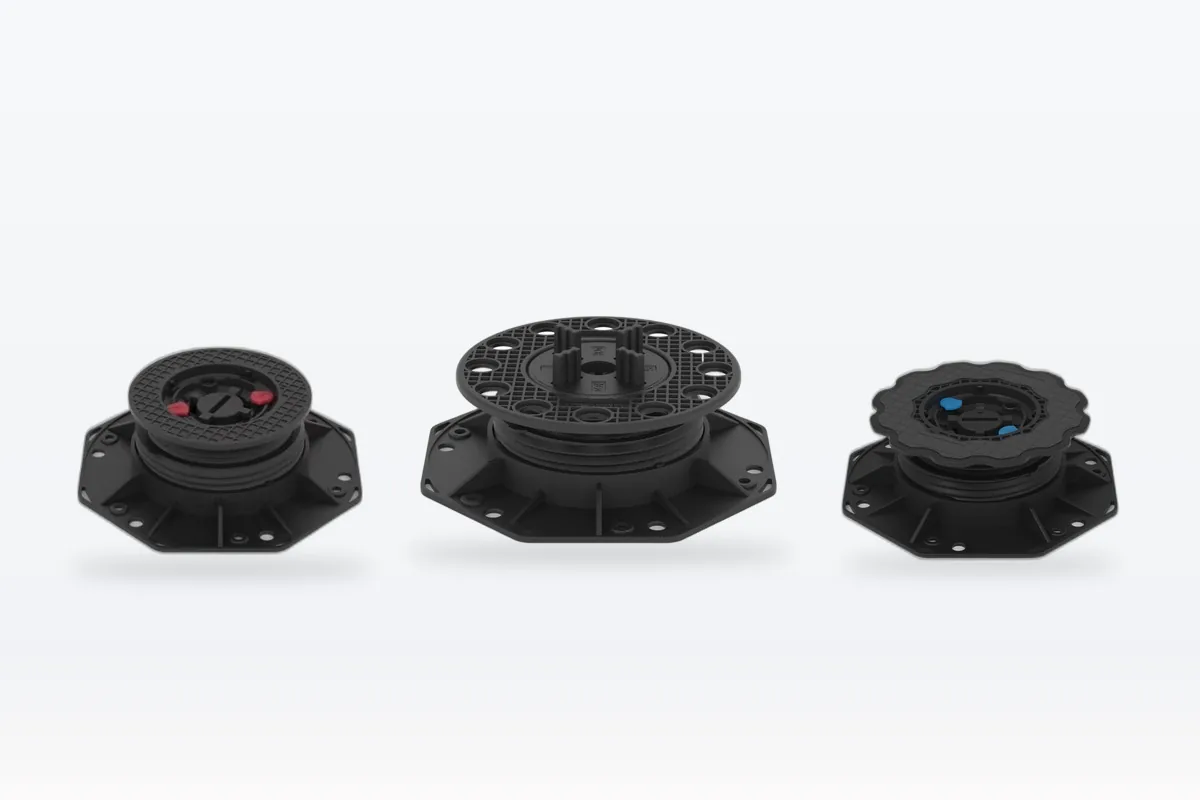
Laying porcelain or stone pavers on adjustable pedestals is one of the cleanest ways to build a flat, drained, ventilated paved surface over a roof slab, balcony or podium — with no mortar, no wet trades and no fixings into the structure. If you want the full paver pedestal installation method for tiles rather than decking, this guide walks through it end to end. For the combined deck-and-paver overview, see our adjustable pedestal installation guide; for how to install paver pedestals on a sloped roof, jump to step 5.
- Lay pavers on a 500–600 mm grid — one pedestal under each 600×600 mm tile corner (≈2.8 pedestals/m²).
- Protect the membrane, then use the ledge head + spacer tabs for even 3–5 mm joints.
- Set height with the rotary ring; use the self-leveling head (±5°) on slopes.
- Level as you go and keep slab drainage falls clear.
1. Tools & materials
- Pedestals sized to your finished height (see the Vitaro series), plus extenders if you exceed the base range.
- Pavers / tiles — typically 600×600 mm (or 500×500 mm) porcelain or natural stone.
- Rubber shims / protection mat for the membrane, and rubber pads for the head.
- Spacer tabs (ledge clips) to hold even 3–5 mm joints.
- Tape measure, string line, spirit level, rubber mallet, utility knife.
- Optional: edge restraint clips for perimeter tiles.
2. Plan the paver grid & spacing
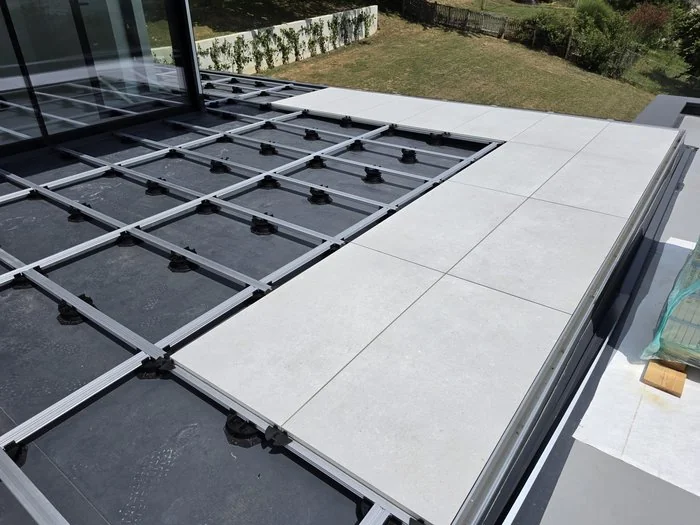
Mark a square grid on the slab. For pedestal spacing for pavers, the rule is simple: with 600×600 mm tiles, place one pedestal under each tile corner so every tile rests on four supports and neighbouring tiles share the corner pedestals.
- Standard (porcelain 600×600): 500–600 mm between pedestals.
- Heavier natural stone: tighten to ~500 mm and confirm against the load table at your finished height.
- Keep the grid aligned with the tile joints so corners always land on a pedestal.
This spacing is the same principle as our overall installation guide grid, just applied to a tiled rather than decked surface.
3. Protect the substrate / membrane
Pedestals protect the waterproofing by spreading load through a wide base — but take two precautions:
- Lay a protection board or rubber mat (or a rubber shim under each base) on sensitive membranes.
- Never drag pedestals across the membrane — carry and place them.
- Keep the drainage falls clear: pedestals are open-sided so water drains between them; don't block the perimeter outlets.
4. Choose the head type & height
Measure from the slab to your target finished floor level. Then:
- For pavers, use the ledge head with spacer tabs — it sets a consistent joint and supports the tile edge.
- Thread the pedestal body to roughly the right height, then fine-tune with the adjuster ring.
- Use a fixed head on flat slabs; use the self-leveling head (±5°) on sloped or uneven roofs so the pavement stays level.
- Add a 100 mm or 150 mm extender if you exceed the base range (F 20–185 mm, B 20–260 mm, HE 25–392 mm).
5. Lay the pavers step by step
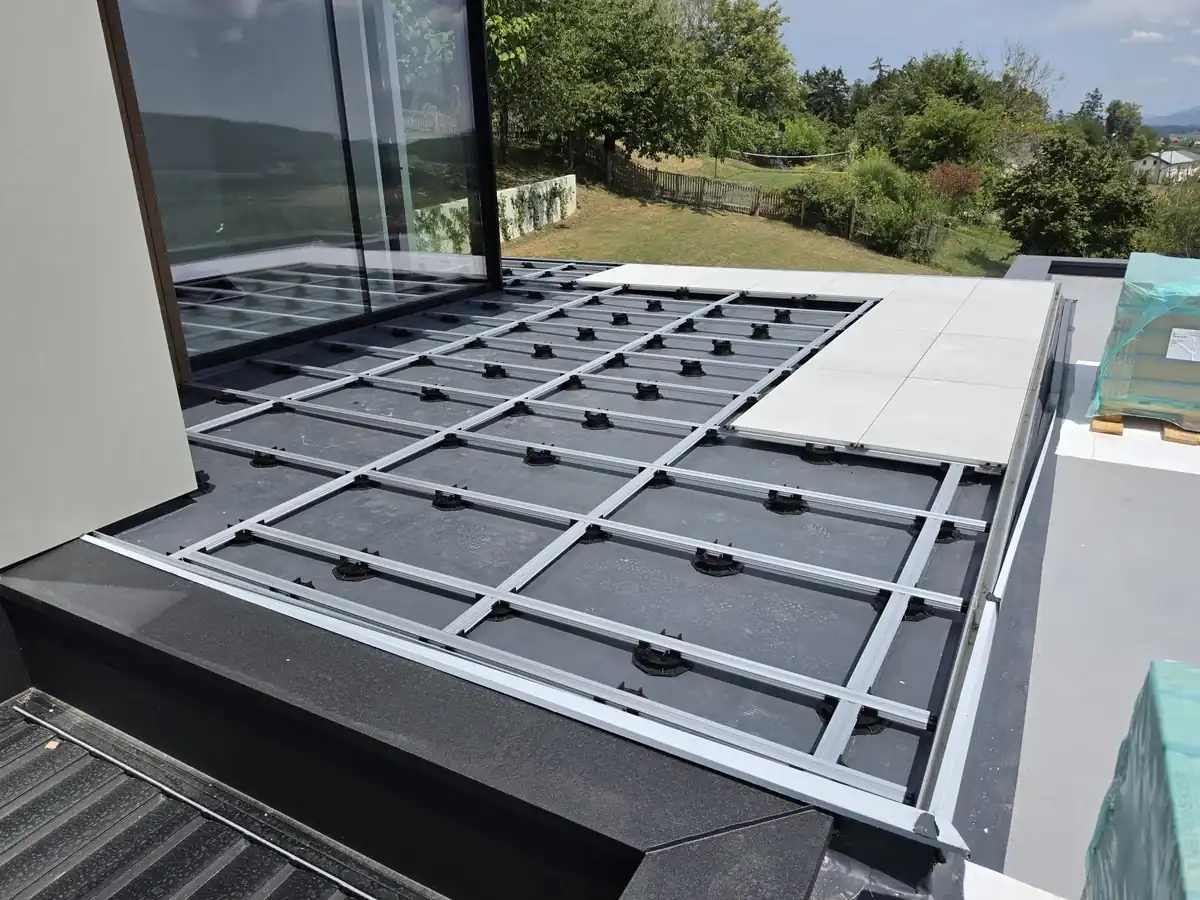
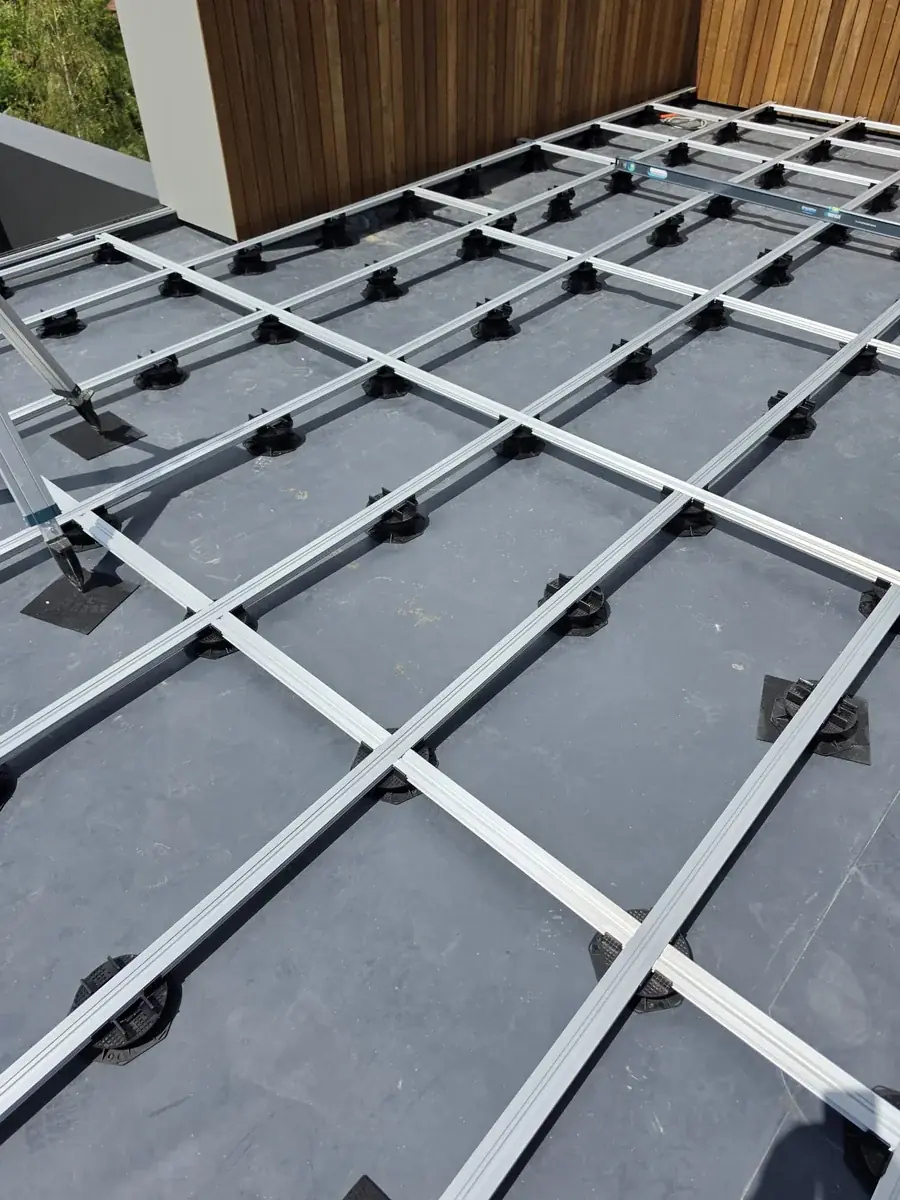
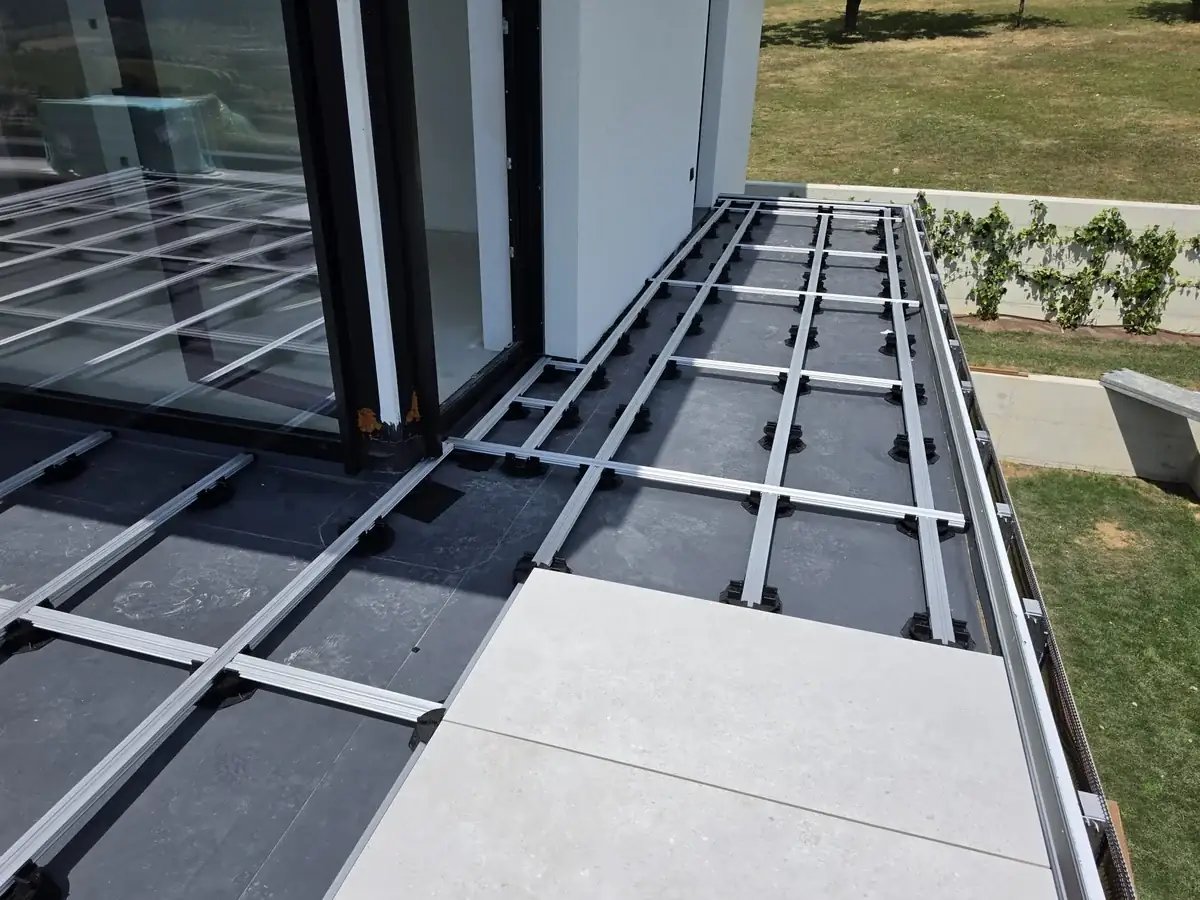
- Place pedestals on the grid; choose the ledge head (with spacer tabs) for even joints.
- Set the first tile on four corners; use the tabs to hold a consistent 3–5 mm joint.
- Work row by row, levelling as you go. A rubber pad on the head stops rattle and protects the tile underside.
- For porcelain paver on pedestals, the same method applies — porcelain is lighter than stone, so you can often stay on the 600 mm grid.
6. Level & keep drainage clear
Once the first bay is down, run a long spirit level across heads and turn the adjuster rings until the surface is flat. Because each pedestal adjusts independently, you correct minor slab variation without shimming — the main advantage over fixed supports. On self-leveling heads much of this is automatic. Throughout, keep the slab falls and outlets unobstructed so water drains freely beneath the pavement.
7. Edge fixing & final check
- Secure perimeter / edge tiles with restraint clips so they can't lift in wind.
- Confirm drainage paths are unobstructed at the slab level.
- Walk the surface: no rocking, no springy spots, even joints. Adjust any outlier pedestal.
- Keep a few spare pedestals and shims on site for later membrane inspection.
8. How many pedestals per m²
A quick planning formula: pedestals per m² ≈ 1 ÷ (tile length in m × tile width in m). Each pedestal is shared by four tile corners, so the count is lower than a naive "four per tile" guess.
- 600×600 mm tiles: 1 ÷ 0.36 ≈ 2.8 pedestals/m².
- 500×500 mm tiles: 1 ÷ 0.25 = 4 pedestals/m².
- Tighter grids (heavier stone, high load) push the number up — confirm against the load capacity and the pedestal calculator.
This is the install-side view of the count; for the cost side of the same number, see adjustable pedestal cost per m² and rooftop paver system cost.
Related guides
Combined overview: Adjustable pedestal installation guide · Rooftop build: Rooftop terrace on pedestals.
Cost: Cost per m² · Rooftop paver system cost · Load: Load capacity.
Product pages: Paver pedestals · Roof pedestals · Deck pedestals · Heavy-duty pedestals · Pedestal calculator.
Frequently asked questions
What spacing do pedestals need for pavers?
Plan a 500–600 mm grid. With 600×600 mm tiles, place one pedestal under each tile corner so every tile rests on four supports and adjacent tiles share the corner pedestals. Use the tighter 500 mm spacing for heavier natural stone or where the load per pedestal is high.
Do pavers need adhesive on pedestals?
Usually not. Pavers sit on the head's ledge (or a rubber pad) and are held by their own weight plus the surrounding grid and spacer tabs. Adhesive is only needed on ramps, steep exposed edges or where local code requires it.
Can you install pavers on a sloped roof with pedestals?
Yes. Use the self-leveling head (auto-compensates up to ±5°) so the finished pavement stays flat over a fall. For very steep slopes, pair it with the slope-corrector option or set a leveling course first.
How many pedestals per m² for paver tiles?
Pedestals per m² ≈ 1 ÷ (tile length in m × tile width in m). For 600×600 mm tiles that is 1 ÷ 0.36 ≈ 2.8 pedestals/m²; for 500×500 mm tiles it is 1 ÷ 0.25 = 4/m². Each pedestal is shared by four tile corners, which is why the number is lower than a naive corner count.
Do pedestals damage the waterproof membrane?
No. Pedestals sit on the membrane (or a protection board) and spread the load through a wide base, so they protect rather than puncture it. Use rubber shims or a protection mat under each base on sensitive roofs and never drag pedestals across the membrane.
How long does paver-on-pedestal installation take?
A balcony or small terrace (10–30 m²) takes a crew half a day once pedestals are set to height. Large rooftops are faster per m² because the grid is repetitive — most time goes into edge fixing and keeping drainage falls clear.